Building and redesigning your home or business space is energizing and maybe a little daunting. It isn't just with regards to how staggering the work looks yet in addition concerning how stable it is developed. For most owners, the troublesome aspect of starting another development project is finding a capable, experienced, knowledgeable, and dependable worker for hire who comprehends the vision that you have for your place – be it business or personal. Picking the right contractor/ worker for your tile installation makes your task at hand a lot easier and fruitful towards the final goal. A project worker can either give great work beginning to end or wind up with a fiasco. Any issue in your project can transform into a bad dream. Following are the top 10 requirements for a quality tile installation that one must ensure while planning for a dream home or business project.
-
Know the intent of your
As an owner, you are the one driving force. Before finalising it with the contractor/worker, invest energy pondering your objectives for the project - how it should look, how long it will endure before the desired goal, the conveniences you need, etc. On the off chance that you don't have the foggiest idea of how to make an interpretation of your objectives into explicit elements or items, enlist an expert to improve the project result.
-
Hire Skilled Contractor / Tile Installer
It makes little difference if your friends, colleagues or relative recommended a particular tile installation worker/ contractor to you, as an owner consistently ensure that the project involves a certified contractor. Make sure the contractor and his team are well equipped with all the tools and equipment needed for the project and follow all safety protocols.
Set aside an effort to notice their work directly, and search for three things: similarities to your project, quality materials, workmanship, and reliable past customer responsibility and fulfilment. The right contractor with a good track record is very important for project completion with the desired result. The best way to ensure a strong foundation for your project is to hire the correct people who will make that foundation, work will reflect the contractor passion and owner desire.
-
Quality Materials
When we plan to have the best project to flaunt in front of others just keep the widely known quote in mind "quality does not come cheap" Good quality material is key for flawless and durable project execution. Tile installation or flooring is an integral part of your large plan that sets the tone for your interior rest of the execution at a later stage.
The materials that are added in this stage should have the characteristics what is needed for the project to have seamless functionality and durability. For instance, if you want to install large tiles or you need thermal shock resistant, crack-resistant, chemical & stain resistant, Epoxy Grout for Floor Tiles.
Saving little money to install the tile with cement mortar or thin mortar rather than feature-rich mortar will cost you dearly in the coming future and it is not a very good idea either.
Leading industry experts believes the best solution to avoid future expense and redevelopment is to use the right material in your project that is required based on your housing areas ( Bathroom, living room, kitchen, office, factory, etc.) geography, climate & nature of the operations.
Tile Installation Basic Material List:
- Tile as per the design and functionality
- Tile Adhesive Price as per the characteristic required
- Tile Grout as per the characteristics required
- Tile Spacer
- Tile hammer
- Grout Float
- Pan
- Electric mixer
- Notched trowel
- Gloves & Safety gears
-
Check the obstacles:
We should be well aware that all tile installation residential or commercial
The use of correct material will prevent the expansion and contraction beneath the tiles. However, it is not recommended to use cement mortar as tiling fixing material as it reacts to humidity and temperature the most.
To tackle this issue all involved parties architect, designer & contractor must be well versed with the placement of critical expansion joints needed during the planning and designing stage.
To ensure this problem remains at bay use the best tile adhesive and Tile grouts that are resistant to harsh weather and temperature this will keep the flooring intact due to the expansion and contraction process
-
Prepare the Surface for Tile Installation
To achieve quality tile installation make sure the surface is in range of flatness tolerance as per the industry standard. Don't leave any area substandard to flatness or the tile installation will have a negative impact on the installation quality.
Ensure that surface is sound, clean and free from all foreign material such as oil, grease, dust etc. If the surface is uneven by more than 15 mm. then first do the levelling by using the correct levelling material in order to avoid using the excess thickness of adhesive.
Do not pre-wet the surface with water. If the surface area is larger, provide movement joint with every 3 meters or as per local standard. In case working on an external façade, avoid direct sun exposure to the surface and to finishing material. Let cool the surface before starting the application. A hot surface may compromise final performance. Follow concrete expansion joint and connection joint as per standard.
-
Surface Rigidity:
Ensure the surface rigidity is as per the tile and stones requirement. Natural stone and large slab tile need twice the rigid floor compared to vitrified ceramic tile or porcelain tiles. Use the right floor hardener or braces for additional rigidity.
-
Read material makers instructions and methods
Make sure to read all the instructions of the manufacturer regarding the materials. Every product and material is made with a specific feature to fulfill the most required feature. Ensure you are using the right product in the correct areas based on the functional requirements of the areas.
Adhesives & Grouts have specific features understand everything with manufacturer TDS (Technical Data Sheet) to understand the best way to use them make sure the contractor follows the instruction to have the best result for the project
-
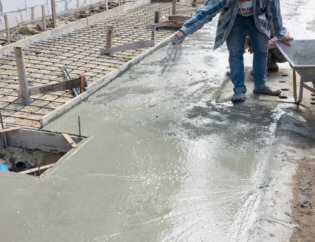
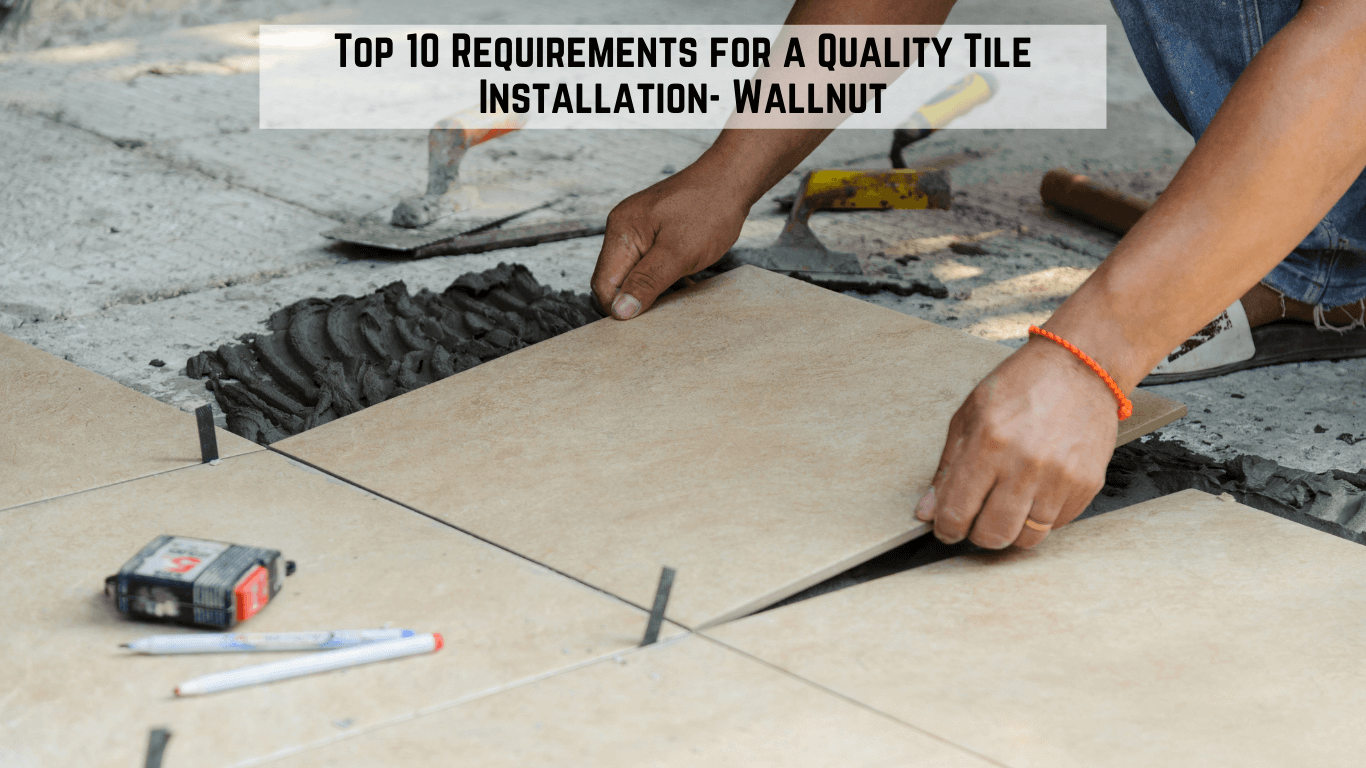
Tile Installation on Surface
Ensure that the tiles are absorbed water for no less than 30 minutes. Spread the adhesive in desired thickness onto the surface using a notched trowel. Make sure the contractor mixes the adhesive in required batches to avoid the wastage of material
Once adhesive is applied, fix the tiles or stone onto adhesive before skin formation and press firmly. In case tiles or stones are of big size, also apply the adhesive layer at the backside.
Make sure adequate space is maintained between the tile for proper grouting to have additional strength and characteristics of premium grout to accommodate surface movement. Use tile spacer to
Maintain the perfect level between the tiles and stones. Leave the tiles or stone for 24 hours to bond well and restrict any foot movement during the setting period.
-
Tile Grouting & Stone Grouting
Grouts come in a variety of color choices to ensure you are using the right color as per the design and the aesthetic use the grout color chart or inspect the grout color in hand at available stores.
Use the most suitable grout color for your project.
Before applying the grout on the overall surface of tiles or stone, test the small area for any discoloration due to absorbency in tiles or stone surfaces.
In case tiles or stone surface is rough or uneven, it is advisable to apply the grout only in the joints and not on the entire surface of tiles or stone to avoid cleaning issue. (A good masking tape also can be used if needed on the edges.)
Spread the grout evenly on the surface of tiles or stone to cover the area. Once the grout is spread, fill the joint completely using rubber grout float. Keep the rubber float diagonally to the joint and apply a 45-degree angle to have a perfect filling. Once all the joints are filled properly, remove excess grout if any from the surface of tiles or stone.
To achieve flush joint, leave the grout approx. 15 to 45 minutes (Depending on temperature) in the joints. (Immediate cleaning of grout is possible, but it may lead to an un-even grout surface finish).
-
Grout Cleaning and Inspection of installation
Start cleaning the grout with clean water and a medium density sponge in a circular motion all over the joints. Finish the joint smoothly and evenly. (Change the water twice or more to have proper cleaning of the surface.)
You can use good tile and stone cleaner if your wish to use them.
The sponge cleaning will ensure the grout leaves a smooth and glossy finish at the joints. Leave the grout for 24 hrs to dry and fully set. Any foot movement must be restricted during the curing time.
After 24 hours inspect the installation with your contractor to find any issue in the installation. If you have followed all the steps we wish you had wonderful project execution. Kudos to you and your team.