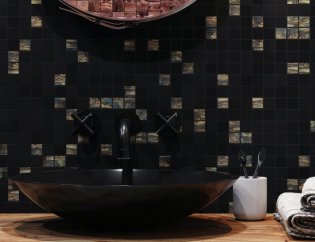
The amount of tile options available in today’s market is enormous, one must choose the design and tiles very carefully for the structure. Tiles can create the best design and creative workspace in the most elegant manner. Now we need to select correct adhesives and grouts for the different surfaces. Strength and durability are the combinations that we want in our project right!
how to fix tiles on metal - Installation of tiles on different surface and substrate depends on few factors:
1) How rigid is the surface to install the tile and stone
2) Material
3) Strength and stability
4) Chemical adaptability
5) Water and Dampness
6) Shrinkage
How to fix tiles on Metal:
Once you have chosen the best design for your home or office it's time for you to understand the material and process it takes to give life to any space. Metal is rigid as we all know which makes the job easier to put any other material on it by carefully choosing the right set of Stone & Tile Adhesive you can put Ceramic, porcelain, marvel, and natural stone.
Based on your designs appeal choose the tile you think will be most suitable for your space. Once the tile is selected now it turns to determine how much tile and Stone is needed for space get the accurate measurement of the space and take 5% extra material in case something breaks! Construction is messy and accidents do happen.
Based on the above given 6 factors check the list to pass the maximum parameters.
Surface Preparation:
How to fix tiles on metal - Clear the metal surface for any kind of impurities such as Dirt, Oil, Grease in order to get the maximum adhesion from the tile adhesives. Adhesive for Metal to Ceramic Tile needs a clean surface to give the maximum effects so any leftover can weaken the bonding between the tile and metal surface
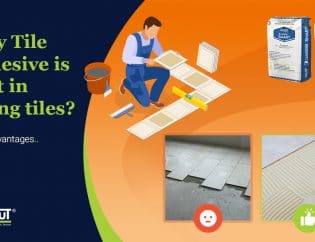
Apply Adhesive:
Once the metal surface is clean now is time to apply the tile adhesive on the metal surface. Tile adhesive comes in multiple forms but the best available option comes in paste or powder form. The Paste form comes in the bucket can be mixed with an electrical mixer or by hand in the quickest possible way. The paste is recommended for small tiles or areas. Powder form needs water and mixing can take little time as compared to paste. However, for a large area or large format tile, the best option would be to go with powder form to cover more ground.
Note: Use a notched Trowel for applying adhesive this will give the correct and even spread across the surface. Let the surface set properly give at least 24 hours. Find out the adhesive properties related to the above 6 factors we pointed to determine long time durability.
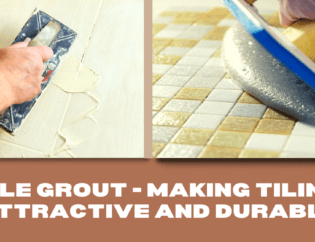
Once the tile adhesive is set it will provide the maximum strength metal and tiles need to remain inseparable for a very long time. Now it's time to grout the surface with grout that’s highly resistant to chemicals and water.
Perfect surface grouting helps the tile to maintain an even surface and maximum strength and durability. After the grouting removes all the leftover material from the surface and cleans it with the recomended chemicals or water. Let the surface remains untouched for 12 hours and will be ready for use.
Fixing tile on Wooden surface:

Fixing tiles on wooden surfaces is one of the most trending and exclusive design options you can create for your family and friends to admire.
Fixing tile on wood needs a little more attention than the metal surface. One must consider shrinkage and water impact on the woods as the surface expand and wrap once comes in contact with water, Dampness.
You need to choose marine grade ply on a wooden surface and use stone and tile adhesives like Calcibond Ultima specially made for surfaces like Metal, Wood, and Non-absorbent tiles.
Repeat the Process:
Surface Preparation -> Apply adhesive -> Fix the tiles -> Grout the surface -> Ready to Use
Fixing tile on Non-Absorbent surface:

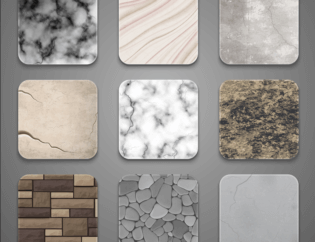
Let's understand first what is different surface materials: 1) Absorbent - Jut drop some water on tiles back and if the water is being observed consider it as absorbent surface
2) Low Absorbent - Repeat the same process drop some water on the back of the tiles and check if the water is being observed but takes a long time you can consider it semi absorbent surface.
3) Non-observant surface: Drop some water at the back of the tile and if water remains on the surface and nothing is being absorbed by the surface consider it as a Non-absorbent surface.
Now if we have to fix tile on a Non-absorbent surface we must make a proper selection of adhesive and Grout in order to have the maximum strength and durability the spaces require. Check the adhesive and grout based on 6 parameters.
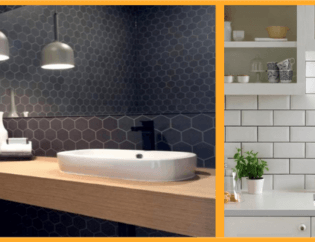
Fixing tile on an existing tile floor or working with non-absorbent tiles such as Vitrified tiles, glass mosaic, rustic tile, or resin mosaics these options are really good for making your dream home more luxurious.
Prior to laying tiles, set up your floor by eliminating any types of cement, mortar, and so on. Level the surface by filling any low spots and breaks in a surface floor with a concrete fixing compound.
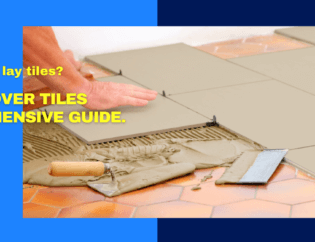
Adhesive or slim set mortars are utilized as bonding specialists to join the tile to the foundation solid floors. Stir up the cement with adequate water, not very less and not very much, thick like a paste consistency. Prior to applying cement in the event that you need your floor to look more impeccable, at that point spread out certain tiles and perceive how the cleaned floor will resemble.
Presently, spread the mortar with a notched trowel evenly on a superficial level contingent upon the size of the tile. Spot the primary tile on the cement or mortar and press it tenderly.
The entire process of fixing remains the same Surface Preparation -> Apply adhesive -> Fix the tiles -> Grout the surface -> Ready to Use